Installing Ariadne
Ariadne has a friendly installation wizard to help you check if your system passes all requirements and install Ariadne. However before you can run the installer, you will need to do a few things by hand:
- You will need to create a database for Ariadne to store its data. For MySQL you can do something like this (on the linux prompt):
> mysqladmin create ariadneOr use one of many MySQL administration tools. - You must also create a user account for MySQL for Ariadne to use. This account must be able to access the database you just created. It needs read and write access as well as the ability to create tables.
- The Ariadne installation package comes with a subdirectory called '
www'. Only this directory must be made available in your web root. You can either copy it or create a symbolic link (symlink in unix). Use a suitable name for the directory, since it will be the root url where you will login to Ariadne, e.g.:/var/www/ariadne/or/home/username/public_html/ariadne/ - In this directory in your webroot, copy the file '
ariadne.inc-unix' or 'ariadne.inc-win' to 'ariadne.inc'. Edit the file and change the$ariadnevariable to the correct installation path of Ariadne, where you extracted the Ariadne installation package. This is where all the other files of Ariadne can be found, outside of the webroot. - In the Ariadne installation directory, make sure that Ariadne has write access to the following:
lib/configs/ariadne.phtml
This allows the installer to write your configuration settings.files/*This is where Ariadne stores uploaded files, templates, cached pages, etc.lib/configs/svn/*This is only needed if you want support for Subversion in Ariadne. This allows you to commit and update templates to and from an svn repository. - Finally rename the file '.htaccess' in the Ariadne webroot under the install/ subdirectory to something else. This will allow you to access the Ariadne installation wizard through your browser. Just enter your website url with
ariadne/install/behind it in your browser, e.g.:http://www.example.com/ariadne/install/
If you named your ariadne directory in your webroot differently, then use that name.
If you want to use PostgreSQL, the instructions are similar, just use the PostgreSQL tools to create a database and database user account.
Installation Wizard
The installation wizard opens with the following screen, asking for the language to use:
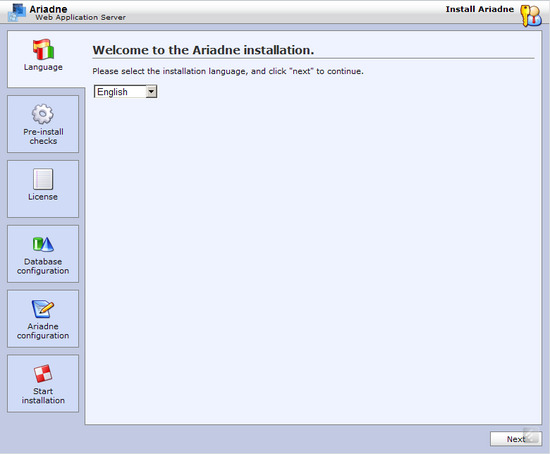
Select your preferred language and click next. The next screen runs the pre-installation checks, to see if your system matches all requirements for Ariadne:
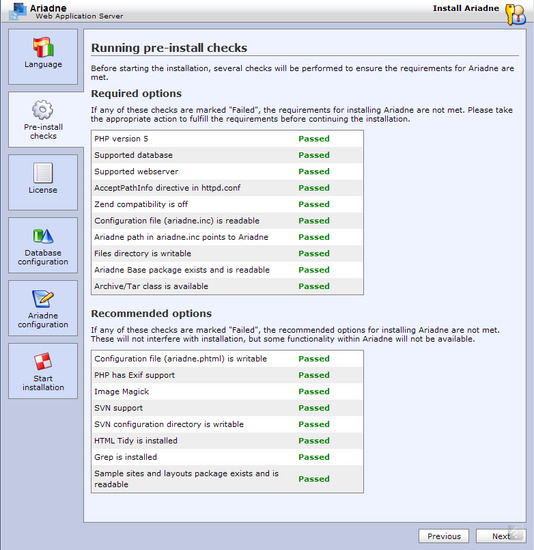 If any part of the requirements is not met, they will be flagged with a red 'failed' mark. If any of the required options are not met, Ariadne can not be installed. The recommended options may fail, but this will impact the usability of Ariadne or prevent some features from working. Any requirement marked 'failed' will also have a question mark icon which links to the installation requirements page and explains the problem in more detail.
If everything is ok, click next to see the license:
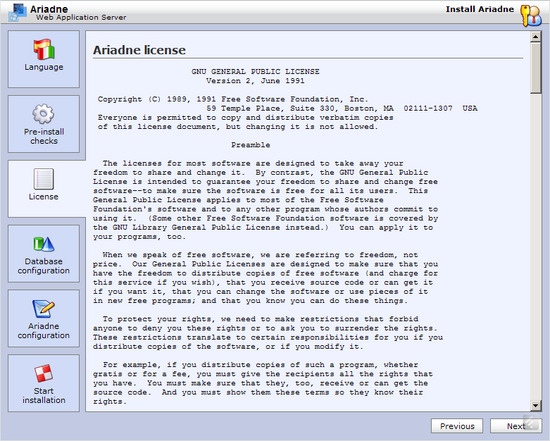
As always Ariadne uses the GPL version 2, click next to proceed to the database configuration:
 Here you must select the database to use. The list only shows those database systems available in your PHP installation and supported by Ariadne. The database name and user account must be created by hand in your database system, Ariadne will not do that for you. Once configured, click next to configure Ariadne itself:
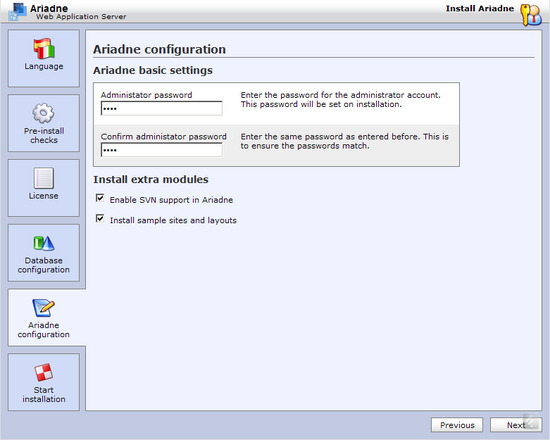
Here you can set your administrator password. This account is similar to root in unix environments, it has access to everything in your Ariadne installation. So choose a secure password and keep it safe. You can also enable some optional modules. Click next to proceed to the actual installation:
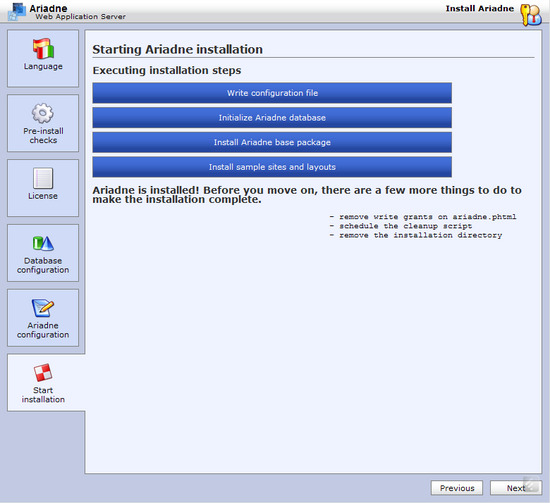 Once you see this screen, with all the progress bars completed, Ariadne has been succesfully installed. All you need to do now is clean up:
- Remove the write access to
ariadne/lib/configs/ariadne.phtml
Ariadne is installed, so there is no need for Ariadne to change the configuration anymore. - Remove the installation directory. You can either completely delete it, or restore the .htaccess file removed earlier. Just make sure nobody but you can run the installation wizard.
- Finally schedule Ariadne's cleanup script to run daily. This script can be found in
ariadne/bin/cleanupIn linux you can simply add this script to the crontab. Make sure it runs as the same user as your webserver though.
A common problem at the final installation step is that the configured database is not empty, the installation screen will look like this:
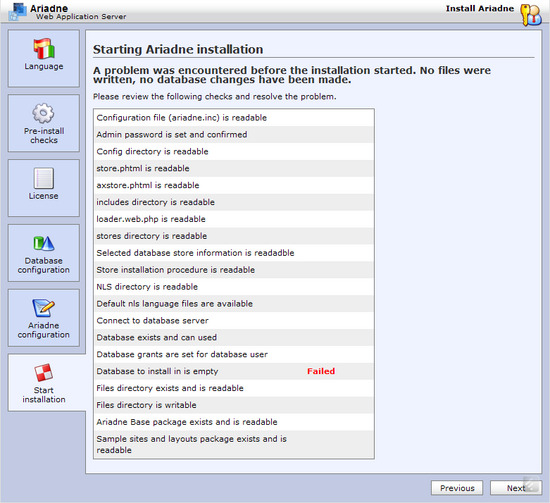
This usually happens after an earlier failed installation. Ariadne checks that the configured database has no tables yet, otherwise it might overwrite an existing Ariadne database. So after a failed installation always drop the configured database and create it anew. Only then rerun the installer.
Manual installation
You can still install Ariadne manually without the wizard, just follow the steps below:
Installation on UNIX-like systems
Required
- Apache 2
- PHP5
- MySQL or PostgreSQL
Recommended
- Apache 2
- ImageMagick
Note: If you are using Apache 2, make sure you set the 'AcceptPathInfo on' in the
Apache configuration (httpd.conf).
Note: Make sure the that you have the following options set in your php.ini
zend.ze1_compatibility_mode = Off
Installation steps:
- untar the Ariadne distribution.
- move the www, lib and files directories to their proper place. Preferably you don't want the lib and files directories under the document root. e.g.:
	cd /opt/
	tar xvzf ~/ariadne.2.7.6.tgz
	cd /var/www
	ln -s /opt/ariadne.2.7.6/www/ ariadne
- Make sure the files directory directory is writable by the webserver user. Ariadne needs to write cache images and templates and other files to disk. So check to see which user your webserver is running as (look in httpd.conf) and (as root) do something like:
	cd /usr/local/lib/ariadne.2.7.6/files/
	chown -R www-data:www-data *
- Create a database for Ariadne to use.
With MySQL do something like:mysqladmin create ariadne
With PostgreSQL do something like:psql template1
template1=# CREATE DATABASE ariadne; - Make sure you also create a user account for Ariadne to use and give it sufficient access to the database you just created.
- Copy the file ariadne.phtml-unix in lib/configs to ariadne.phtml. Edit this file and fill in your system-specific details. You need to at least enter your host name, database name and account, and check all paths.
- Copy the file www/ariadne.inc-unix to www/ariadne.inc and edit it to reflect the includepath to the Ariadne lib directory.
- Run the file www/install/install.php.
You can do this from the browser or, if you have the cgi version of php installed, from the command line.
- Point your webbrowser to your installed Ariadne url.
You'll be asked for a username and password. Use username 'admin' and password 'muze'.
If everything is installed properly you should now see an explorer like interface with 'Administrator' in the top left corner.
If you have trouble logging in, try running the ariadne/install/setadmin.php script from a webbrowser. It allows you to set your admin password. Remove the .htaccess file in the ariadne/www/install/ directory first though.
- If everything works ok click on 'Administrator', then on 'edit' in the newly appeared tabdisplay on the right. Now change the administrator password.
- Important: Move the directory www/install and all it's contents somewhere safe, meaning _not_ in your webserver's documentroot, or make sure there's a .htaccess or something similar to prevent access to these scripts.
- Schedule the cleanup script (bin/cleanup) to run daily. It removes expired session data.
- To make full use of image manipulation you need to have ImageMagick installed. Make sure the path to ImageMagick is correctly set in the Ariadne config. ImageMagick can be obtained from http://www.imagemagick.org/www/download.html
Installation on Windows systems
IIS will probably still work, but we haven't tested it recently with PHP5.
Using IIS
1. Install PHP 5
Read the install.txt file for further instructions. Don't forget to install the isapi version of PHP.
2. Configure IIS
Start the 'Internet Services Manager', you can find it from the Start menu -> Programs -> Administrative Tools -> Internet Services Manager.
Now create a new website for Ariadne by rightclicking on the folder with the name of your system and selecting new -> website. Alternatively you can install it in an existing website if you like. Do make sure that the Web Site Access Permissions are set to 'read' and 'execute'.
Tip: If you don't use IIS's 'default' website, we advise you to disable it. This will help to make your system more secure.
Make sure that PHP is enabled in the Ariadne website. You can read instructions for this in the PHP installation instructions (install.txt).
You can now continue the installation with the part title 'Common Installation' further in this document.
Using XAMPP
Download the XAMPP installation package from http://www.apachefriends.org/en/xammp-windows.html.
Choose the default install (thus without enabling services).
Start the XAMPP Control panel and click both the 'apache' and 'mysql' start buttons.
When Apache and MySQL are running, startup your browser and open http://localhost/. Click phpMyAdmin, enter 'ariadne' into the Create new database input field, and click the create button.
Add a user to MySQL for access to the database. Do this by clicking privileges and click the link Add a new user. Fill in all required fields, e.g.:
User name: ariadne
Host: localhost
Password: secret
Re-type: secret
Check the Create database with same name and grant all privileges option from the Database for user list and click the go button at the bottom of the page.
Edit c:\xampp\php\php5\php.ini where you have to disable magic_quotes_gpc and ALL Zend settings (as the Zend optimizer is NOT compatible with Ariadne).
You can now continue the installation with the part title 'Install Ariadne' further in this document.
Using Apache
These are the installation instructions when you want to run PHP with Apache for windows. If you want to use IIS instead, finish the previous part titled 'Using IIS' first, then continue the installation with the part titled 'Install MySQL'.
1. Stop IIS
If you are not already running Internet Information Services (IIS) you can skip this step.
If you want to run Ariadne on the default webserver port (80), you need to stop IIS permanently. Ariadne requires Apache and Apache cannot run on the same port as IIS. To stop the webservice of IIS, go to start->programs->aministrative tools->services and right-click on 'World Wide Web publishing services'. Select 'Properties' and click on the 'Stop' button if it is enabled. Then select 'disabled' in the startup-type selection box.
2. Install Apache
Apache can be downloaded from http://httpd.apache.org/ or one of its mirrors.
The installation wizard will guide you through the initial installation of Apache. Remember the installation path you selected for Apache.
3. Install PHP 5
Download the PHP 5 windows binaries from http://www.php.net/downloads.php or one of its mirrors.
Unzip PHP and install it somewhere (e.g.: C:\PHP\). Read the install.txt file for further instructions. Remember: you need to install PHP as a module in Apache, don't install the CGI version.
5. Configure Apache
Apache itself is not configured yet. Browse to the conf directory under the Apache installation directory and open the httpd.conf file for editting (it is text file). Search for the text 'LoadModule'. Between the list of modules there's probably a line like this:
#LoadModule php5_module modules/apachemodulephp.dll
Change this line to this:
LoadModule php5_module modules/php5apache.dll
Note: the name of the module has also changed.
Then search for the text 'AddType'. Between the list of application type's, you can find the line:
#AddType application/x-httpd-php .php
Change this line to this:
AddType application/x-httpd-php .php
Finally search for this line:
DirectoryIndex index.html index.shtml
And add index.php at the end of the line.
The file httpd.conf contains numerous other configuration settings, for more information on configuring Apache for Windows goto http://www.apache.org/.
Now you need to test whether Apache will run with PHP installed. First youwill need to restart the Apache service. You can do this from the Start menu -> Programs -> Apache -> Restart Apache.
To check if everything is installed correctly, create a file with the name 'info.php' in the Apache document root (e.g.: C:\Program Files\Apache Group\Apache\htdocs\) with the following contents:
	<?php
		phpinfo();
	?>
Start a web browser and go to http://localhost/info.php. If everything installed ok, you should see a formatted page displaying some information about PHP and Apache.
Install MySQL
Download and install MySQL normally. The installation wizard will guide you through the initial installation of MySQL.
After the installation wizard finishes, start the program winmysqladmin.exe from the bin directory under the Mysql installation directory. This program will first ask you to enter a username and password. You can use these to connect to the MySQL database from now on. The program has placed itself in the system tray, so click on the 'traffic light' icon there and select 'show me'. Now press the 'my.ini Setup' tab. Enter the correct values for the base directory and select 'mysqld-nt'. Check the entries in the my.ini file and then press 'Save Modification'.
Finally you need to create two databases for Ariadne to use later. Click on the tab databases. Right click on the computer name in the Databases overview and select create database. Now enter the name of your ariadne database, e.g. ariadne, and click on create the database. The input dialog will remain and you can enter the second database, used for storing session information, you might call that ariadne_sessions.
Install Ariadne
Start by unzipping the file ariadne.2.7.6.zip to a suitable directory ( e.g. C:/Program Files/Ariadne.2.7.6/ ) .
Now you can either move the www directory from the ariadne installation directory to a new directory in the document root of the webserver, e.g. /ariadne/, or you can direct the webserver to an alternative directory.
If you are using Apache, you can add an alias directive to the Apache's httpd.conf. e.g.:
Alias /ariadne/ C:/Program Files/Ariadne.2.7.6/www/
Don't forget to restart Apache again after this change.
If you are using IIS, you can add a Virtual Directory with the same effect. In the Internet Services Manager you can select the Ariadne website, right-click on it and select 'new' -> 'Virtual Directory'. In the wizard enter a name for the ariadne virtual directory, e.g. "ariadne", and point it to the C:\Program Files\ariadne.2.4\www\ directory.
Configure Ariadne
Next you need to configure Ariadne. There are a few configuration files, if you forget one of these, Ariadne won't run and remain strangely quiet :)
The first file is in the www (or /ariadne/) directory, called 'ariadne.inc-win'. Copy this file to 'ariadne.inc' and edit it. Change the path in the file to point to the (fully qualified) path of the lib directory under the Ariadne installation dir (e.g. C:/Progra~1/Ariadne.2.7.6/lib/).
The next files are in the lib/configs/ directory under the ariadne installation directory. Copy ariadne.phtml-win to ariadne.phtml and edit it. Remember to enter the username and password and database names you entered when you installed MySQL.
Now got to the control panel and start system again. Click on advanced and then Environment Variables. Select the Path variable from the system variables box and press Edit. Now add the bin directory in the Ariadne installation directory to the path, e.g. C:\Program Files\ariadne.2.7.6\bin .
The final step is running the Ariadne initial installation script. This script populates the database with a minimal set of objects. Start your browser and go to the url http://localhost/ariadne/install/install.php. The script will display a lot of messages, as long as none of them say 'ERROR', you are allright :)
You should now be able to login to Ariadne. Point your webbrowser to your webserver, e.g. http://your.host.com/ariadne/ and enter 'admin' as username and 'muze' as password. If you don't see a logon form but a message saying 'the object you requested could not be found', then the installation went wrong. Check to see if you entered the correct paths and fix them if necessary. Then drop the ariadne database and create it again (the fastest way to 'clear' them) and run the install.php script again.
If you successfully logged on, then before you do anything else remove the ariadne/install/ directory in the document root. This is an installation directory used for the webbased install, which can mess up your database if someone runs the scripts in it later. You might want to keep the files around somewhere, as there is also a script 'setadmin.php' in it, which come in handy if you ever forget the password for 'admin'.
If you need more assistance with the installation, try the forums at http://news.muze.nl/.